Cleaning your devices is essential to keep them running smoothly and to extend their lifespan. Whether you’re at home, school, or work, your electronics can become a magnet for dust, dirt, and germs.
Using the right techniques and products to clean your devices can prevent damage and ensure they remain in good condition.
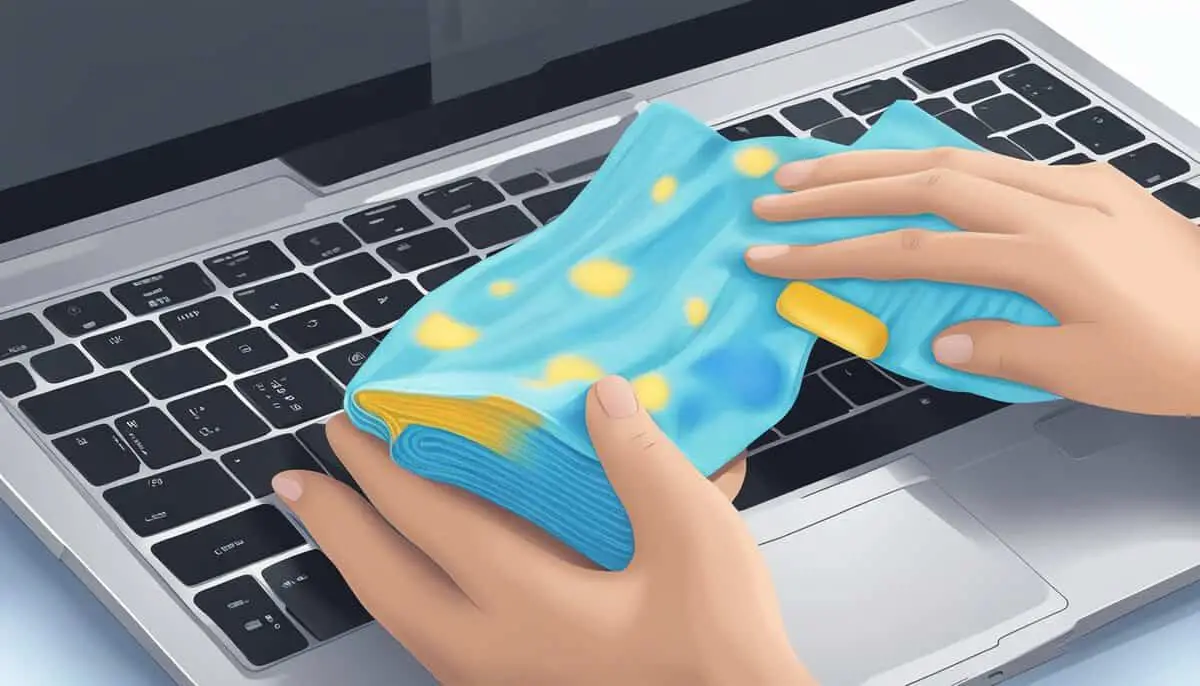
Before you start cleaning, make sure to power down and unplug your devices. Never spray or apply liquid directly onto your device. Instead, use a damp cloth with a solution recommended for electronics. For screens and monitors, stick to a dry, lint-free cloth and gently wipe in long motions. Harsh chemicals should be avoided since they can cause irreversible damage.
Deep cleaning your keyboard and mouse can also make a big difference. Use a cotton swab dipped in isopropyl alcohol to clean between the keys and in crevices. Remember, maintaining your devices not only ensures they look good but also helps them perform better over time.
Key Takeaways
- Power down and unplug devices before cleaning.
- Use a damp cloth, not harsh chemicals, for most surfaces.
- Clean between keys with isopropyl alcohol.
Preparing Your Devices for Cleaning
Before you start cleaning your devices, it’s important to ensure they’re safe and ready for the process. Follow these steps to avoid damaging your equipment and to make the cleaning more effective.
Power Down and Unplug
First things first, always power down your device and unplug it from any power sources. This step is crucial for safety. It prevents any electrical shock and protects the internal components from damage.
Make sure to disconnect all peripherals like keyboards, mice, and monitors. Not only will this make the cleaning process easier, but it will also help you reach all areas of your device.
Shut down your system properly. For computers, go through the standard shutdown procedures. If you’re cleaning a handheld device, hold down the power button until it switches off. This ensures your system isn’t caught mid-task, which can be harmful.
Remove Loose Dirt and Dust
After your device is safely powered down and unplugged, start by removing loose dirt and dust. Use a dry, soft, lint-free cloth to wipe the surface of the device lightly. This will remove most of the surface dust without scratching the screen or case.
For areas like the keyboard, fan, and vents, compressed air is very effective. Hold the can upright and give short bursts to avoid moisture buildup. This will help clear out any debris that’s stuck in these tight spaces.
Don’t forget the computer case. Open it up and carefully use compressed air to blow out dust from internal components. Ensure proper airflow by cleaning out the fan and other parts. This not only keeps your system clean but also improves its performance.
Avoid using harsh chemicals or abrasive materials, as these can damage the surface or internal components of your device. Always refer to the manufacturer’s instructions for recommended cleaning products.
Cleaning Screens and Monitors
Cleaning screens and monitors involves using the right materials and methods to ensure you don’t damage the display. You’ll need specific cloth types and cleaning solutions, along with careful wiping techniques.
Choosing the Right Cloth and Solutions
When it comes to cleaning your computer screen or laptop screen, a microfiber cloth is your best friend. This soft, lint-free material prevents scratches and effectively removes dust and smudges. Avoid paper towels or tissue paper since these can be abrasive.
For cleaning solutions, steer clear of harsh chemicals like glass cleaners or Windex, which can damage the screen. Instead, you can use a mixture of distilled water and a small amount of isopropyl alcohol. Some prefer alcohol wipes, but ensure they don’t contain other harmful substances.
Don’t ever spray the solution directly on the screen. Instead, dampen the microfiber cloth slightly to avoid excessive moisture that can seep into the edges and cause damage. Apple and HP both recommend similar gentle cleaning practices for their devices.
Wiping Techniques and Precautions
Start by turning off and unplugging your device to eliminate any risk of electrical damage or heat-related issues. Use canned air to blow away loose dust and particles from the screen and around the edges.
Gently wipe the screen with the microfiber cloth in a circular motion, applying light pressure. Don’t scrub or press hard, as this can harm the display. If you encounter stubborn smudges, dampen the cloth with your chosen cleaning solution and attempt again, always using a light touch.
Be cautious around the edges of the screen to prevent any liquid from seeping into the device, which could lead to internal damage. By following these steps, you not only clean the screen effectively but also help reduce germs on your devices.
Deep Cleaning Keyboards and Mice

Having a clean workspace is essential, especially when fighting off germs like coronavirus. You can effectively dislodge crumbs and disinfect your keyboard, as well as sanitize your mouse for smooth operation, with the right techniques and products.
Keyboards: Dislodging Crumbs and Disinfecting
First, disconnect your keyboard from your computer. Turn it upside down and gently tap it to shake out crumbs. Use compressed air to blow out any remaining debris between the keys. Avoid pointing the air directly at the keyboard to ensure crumbs don’t get pushed deeper inside.
Remove keycaps if possible. Soak them in warm, soapy water for about 30 minutes. Gently scrub each keycap with a soft brush or your fingers.
Use a microfiber cloth with isopropyl alcohol to clean the keyboard surface. Pay special attention to commonly touched areas. Alcohol wipes also work well but avoid bleach as it can damage surfaces. Reattach dried keycaps carefully.
Mice: Sanitizing for Smooth Operation
Unplug your mouse before cleaning. For mechanical mice, dismantle them by unscrewing the bottom panel. Use a cotton swab dipped in isopropyl alcohol to clean the ball and internal parts. Don’t forget to clean the ports.
For optical mice, a damp cloth with a small amount of disinfectant works well. Wipe down buttons and the bottom of the mouse to remove germs and bacteria.
Use a dry cloth to make sure everything is dry before plugging in the mouse again. Maintaining a clean mouse ensures smooth gliding and accurate tracking.
Safeguarding Internals and Ports

Taking care of the internals and ports of your devices is crucial for their longevity and performance. Proper cleaning techniques can help you avoid damage and keep your electronics running smoothly.
Preventing Damage to Internal Components
When cleaning devices, it’s important to protect internal components. Always power off and unplug your devices before you start. This step can prevent electrical issues and unexpected shut downs.
Consider opening the computer case periodically to clean dust and debris. Use a can of compressed air to blow out dust from delicate areas like the fan and circuit boards without touching them. Make sure to keep the airflow direction consistent to avoid pushing dust further into the device.
Avoid using water or liquid solutions near internal parts. Liquid can cause short circuits and damage components. Instead, use a dry, lint-free cloth or a small brush to gently clean surfaces. A checklist of tasks, like dusting the inside and checking connections, can help you stay organized.
Cleaning USB and Other Ports Safely
Ports like USB, HDMI, and headphone jacks are prone to collecting dust and debris. To clean these areas safely, start by turning off your device and unplugging all cords. Gently use compressed air to blow out dust and dirt from the ports.
For stubborn debris, a toothpick or a small, soft brush can be effective. Carefully insert it into the port and move it around to dislodge particles.
Avoid using metal objects or excessive force, as these can damage the port’s delicate connectors. Additionally, don’t use liquids in these areas.
If you’re dealing with water damage, leave the device off and allow it to dry completely before attempting any cleaning. This precaution can help prevent further issues.
Maintaining Your Devices Post-Cleaning

Keeping your devices in top shape requires regular maintenance and digital cleanup. These practices help extend the life of your gadgets and keep them running smoothly.
Regular Maintenance Schedule
Creating a routine can help maintain your devices. After cleaning, it’s important to set a regular maintenance schedule to ensure your devices remain in optimal condition.
First, keep a checklist of tasks such as dusting your PC or laptop vents, wiping screens with a lint-free cloth, and checking for any signs of wear. Make sure to always power off your devices before cleaning to avoid any damage.
Allow cleaned areas to air dry completely before turning them on. This reduces the risk of moisture damage.
Keeping your devices in a clean environment helps too. Avoid eating or drinking near your electronics, and try to minimize exposure to dust and dirt.
Digital Cleanup: Files and Storage
Maintaining your devices isn’t just about physical cleaning. Digital cleanup is equally important. Start by using tools like disk cleanup to remove unnecessary files. Temporary files and old programs can take up significant space and slow down your PC or laptop.
Organize your folders regularly. Delete duplicates and move important files to the cloud to free up local storage. Cloud storage is a great way to keep your data safe while reducing clutter on your device.
Regularly scan for viruses and malware. Keeping your antivirus software up to date can protect your devices from threats and ensure they run smoothly.
Lastly, periodically check your device’s storage capacity. Make sure you’re not running low on space, as this can impact performance. Clearing out unnecessary files can help keep your devices running efficiently.

