
Removing a hard drive from a desktop computer is a straightforward task you can complete with some basic tools and a careful approach.
If you’re looking to upgrade your current system with more storage capacity, replace a failing drive, or if you’re disposing of an old computer and want to keep your data secure, knowing how to remove the hard drive is essential.
The process ensures that your data remains private and provides you the opportunity to use the drive on another machine or as an external storage solution.

Before you start, it’s crucial to back up any important information stored on your hard drive, as the removal process could lead to data loss if not performed correctly. Once you’ve secured your data, ensure that you have the right type of screwdriver on hand, since most desktop hard drives are held in place by screws.
Power down your computer completely and unplug all cables before opening your computer case to access the hard drive. The inside of a computer can be sensitive to static electricity, so it is also a good idea to ground yourself to avoid damaging the components.
With your computer prepped, the removal process involves locating your desktop hard drive, which is typically found in a dedicated hard drive bay, disconnecting the data and power cables attached to it, and then unscrewing it from the chassis.
Careful handling during these steps will prevent any damage to the drive and ensure a smooth transition, whether you are moving the drive to a new computer, setting it up as an external drive, or preparing it for secure disposal.
Preparation and Precautions

Before you begin the process of removing a hard drive from your desktop computer, it is crucial to prepare adequately and take necessary precautions to avoid damaging the hardware or compromising your safety.
Safety Procedures
Your primary concern should be to minimize the risk of static discharge, which can damage the components inside your computer. Wearing an anti-static wrist strap is an effective way to ground yourself, ensuring that any potential static buildup is safely discharged away from sensitive electronics.
Before starting, power down your desktop and unplug all cables, then press the power button once more to discharge any residual electricity.
Gathering Necessary Tools
You will need the appropriate tools to remove a hard drive safely. A standard screwdriver is essential, as hard drives are typically secured with screws. Make sure that your screwdriver matches the screw heads to prevent stripping them.
Although no significant technical skills are required, proceeding with a level of professional care is advised. Here, patience and precision are your allies in avoiding any accidental damage to your system or the hard drive itself.
Removing the Hard Drive
Carefully removing a hard drive is a straightforward process, but it’s important to handle the components delicately and to maintain a safe work environment. This procedure involves opening your computer case, detaching necessary cables, and unscrewing the drive before safely extracting it from the system.
Opening the Computer Case
To begin, ensure your computer is powered off and all cables are disconnected from the back. Lay the computer on a flat, stable surface to access the side panel. Most cases are secured with two to four screws on the rear or sides.
Remove these screws, set them aside, and carefully slide off the side panel to expose the internal components. Some cases may have a lever or button that releases the panel.
Unplugging Cables and Removing Screws
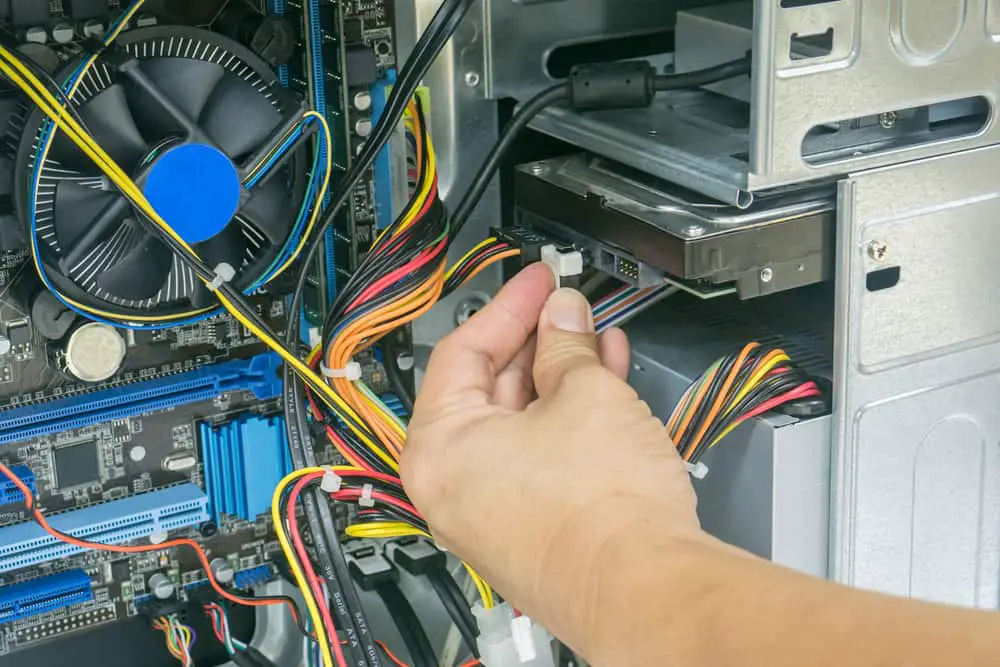
Locate the hard drive within the drive bay or cage. Two main cables are connected to the back of the hard drive: the SATA cable, which transmits data, and the power connector, supplying power to the drive.
Gently disconnect these cables by squeezing the clips and pulling them straight out to avoid damaging the ports. Secure the cables out of your work area. Then, identify the screws holding the hard drive to the mounting bracket or cage.
There may be screws on both sides. Use a screwdriver to remove these screws and keep them with the side panel screws.
Taking Out the Hard Drive
Once detached, hold the hard drive on the sides and carefully slide it out of the bay or cage. If it’s inside a bracket, you may need to lift the bracket slightly to free it from the case.
Handle the hard drive with care, as it contains delicate components. Now that it’s removed, you can proceed with your intended task, such as upgrading or securely erasing data from the drive.
Post-Removal Actions

Once you’ve successfully removed the hard drive from your computer, it’s crucial to handle the old storage device carefully and consider the next steps to ensure your data’s safety and the continued performance of your system.
Handling the Old Hard Drive
After removal, if your old hard drive is still functional, you have several options. You can transform it into an external hard drive with the use of an enclosure. This process requires a data cable for connection and can turn your old hard drive into a portable storage unit.
Should you opt not to reuse the hard drive, ensure that all personal data is securely erased to prevent unauthorized access to your information.
Data wiping tools or professional services are advised if the drive will be discarded.
Preparing for New Storage Solutions
In anticipation of a new hard drive or alternative storage, review your options:
- Cloud Storage: Services like Google Drive and Dropbox offer convenient access to your files from any location with an internet connection.
- External Hard Drive: A practical option for large files and backups, easily connected via USB.
- USB Flash Drive: Ideal for smaller files or as a temporary storage solution while transitioning between hard drives.
Before you can begin copying data to your new storage medium, ensure you have the appropriate data cable and any necessary software installed. If you’re moving to cloud storage, confirm that you have a reliable internet connection to upload your files smoothly.