
When you boot up your computer and discover that it only recognizes half of the installed RAM, it can be both confusing and frustrating. RAM, or random access memory, is crucial for your computer’s ability to run multiple applications smoothly and manage tasks efficiently.
If your system’s reported memory is less than what you’ve installed, it’s a signal that something is amiss with your computer’s hardware or settings.

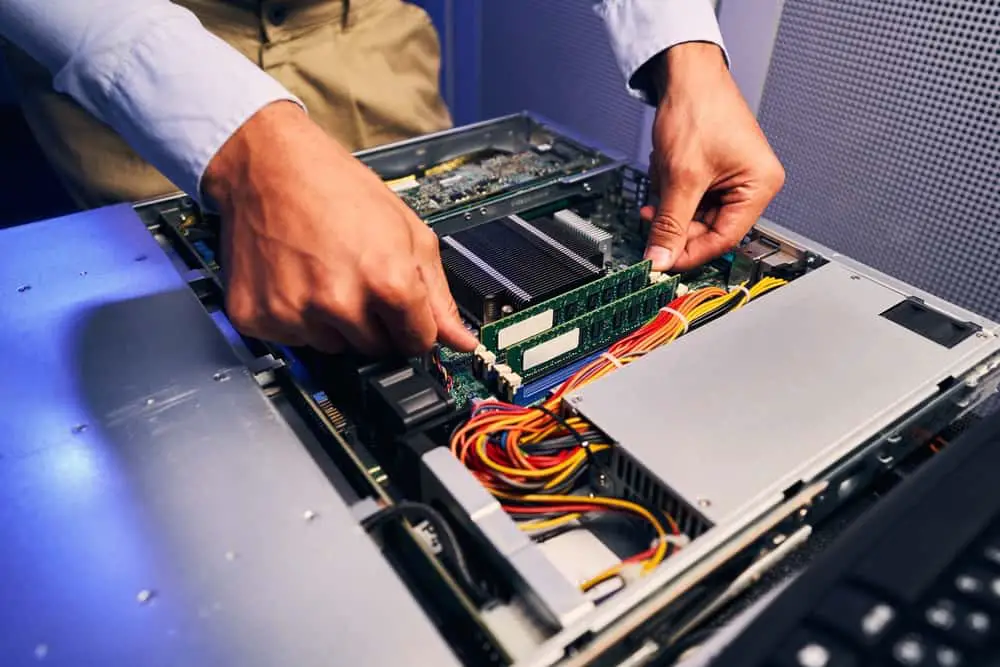
Several factors can contribute to your computer only detecting half of its RAM. Physical issues such as improper seating of the memory modules or dust in the slots may be causing the problem.
On the software side, your system’s BIOS settings might need adjustment, or there might be a limitation within the operating system itself. Understanding the relationship between your computer’s technology and its memory is essential for troubleshooting this issue.
To get to the root of the problem, you’ll need to perform some checks and possibly adjustments. Ensuring that your RAM sticks are compatible with your motherboard and that they are installed correctly in their respective slots is a first step.
If the hardware isn’t at fault, delve into system settings or explore potential updates and configurations that can affect how the memory is allocated and recognized. Working through these steps methodically will help you resolve the issue and restore your computer’s performance to its full potential.
Understanding RAM and Its Importance
Random Access Memory (RAM) is a critical component in your computer that directly influences its performance and ability to run applications smoothly. Let’s break down what you need to know about RAM.
Memory Specifications and Capacity
RAM Capacity: Measured in gigabytes (GB) and terabytes (TB), the capacity of your RAM determines how much data it can hold. Most modern desktop systems come with a minimum of 8GB of RAM, which is sufficient for basic multitasking and everyday applications.
However, 16GB or more is recommended for demanding software and games.
RAM Specifications: Include the type (e.g., DDR3, DDR4), speed (measured in MHz), and timings (latency figures), all of which impact performance. The right combination of these specifications is essential for optimal system efficiency.
RAM and System Performance
RAM is your system’s short-term memory, temporarily holding data that your CPU may need to access quickly. Insufficient RAM can lead to sluggish system performance when running multiple applications or during data-intensive tasks.
With more RAM, your system can handle more data simultaneously, improving overall speed and responsiveness.
Compatibility with Operating Systems
Different operating systems handle RAM differently. For example, a 32-bit Windows operating system can only utilize up to 4GB of RAM, while a 64-bit system can recognize and use vastly more.
It’s important to verify your operating system’s limitations when upgrading or replacing your computer memory.
Identifying RAM Issues
Issues like your computer recognizing only half the installed RAM can be caused by a range of factors including improper installation or incompatible hardware.
To troubleshoot, you can check system configuration settings, run diagnostics tools, and reseat or replace memory modules, if necessary.
Role of RAM in Multitasking
RAM plays a pivotal role in multitasking by allowing you to run several applications concurrently without significant performance drops.
Efficient memory management ensures that your active applications have enough RAM to operate effectively while also pre-loading frequently used data to reduce load times.
Troubleshooting Common RAM Detection Problems
If your computer is only showing half the RAM installed, you might be facing issues with hardware recognition or system configuration. Here’s how to tackle some common RAM detection problems that could restore your system to full functionality.
Checking RAM Capacity and Usage
First, confirm the total RAM installed and its usable capacity. Access your System Information to check the total physical memory and ensure your Windows operating system is reporting the correct amount.
For specifics, you can press Win + R, type msinfo32, and hit Enter to view system details. If the amount displayed is different from what you expect, power off your computer, reseat the RAM sticks, ensuring they click into place, and verify if both memory sticks are recognized.
Updating BIOS and Drivers
Ensure that your BIOS and motherboard drivers are up-to-date. An outdated BIOS can lead to miscommunication with newer hardware components. Visit your motherboard manufacturer’s website to find instructions or a tool for a safe BIOS update.
Similarly, updating your system drivers can resolve compatibility issues. You can update drivers through the Device Manager in Windows, or by downloading the latest drivers directly from the manufacturer.
Adjusting System Settings for Optimal RAM Utilization
Adjust system settings through msconfig and the registry editor to ensure Windows uses all available RAM.
Run msconfig by typing it into the Start menu, navigate to the Boot tab, and check the Maximum Memory under Advanced Options to confirm it’s set correctly. In the registry editor, follow this path: HKEY_LOCAL_MACHINE\SYSTEM\CurrentControlSet\Control\Session Manager\Memory Management, and set the value of ClearPageFileAtShutDown to 0.
This ensures that pagefile settings are not causing any memory issues. Please proceed with caution and back up the registry before making changes.
Advanced Solutions and Considerations
When addressing the issue of a computer only recognizing half the installed RAM, you may need to consider more technical steps beyond basic troubleshooting. Advanced solutions often require a careful look into RAM configurations, hardware limitations, and even the operating system itself.

Manual Configuration of RAM Settings
Your system’s BIOS or UEFI settings can sometimes override default configurations, impacting RAM performance. Access your system’s settings during boot-up, generally by pressing keys like F1, F2, Del, or Esc.
Look for Memory Settings, where you can adjust timings and voltage. Ensure that the RAM speed (MHz) and CAS Latency (CL) match your RAM’s specifications. Incorrect settings here can prevent correct RAM detection.
- Example of RAM Timings Configuration:
- T1: CAS Latency (CL): Set as per manufacturer’s specification
- T2: RAS to CAS Delay (tRCD): Set as per manufacturer’s specification
- T3: RAS Precharge (tRP): Set as per manufacturer’s specification
- T4: Cycle Time (tRAS): Set as per manufacturer’s specification
Hardware Compatibility and CPU Limitations
Compatibility between your RAM and motherboard is crucial. Ensure that the memory capacity and technology match your motherboard’s specifications. It’s possible that the motherboard supports only a certain amount of memory per slot or has a maximum RAM limit.
Your CPU can also impose memory limitations. Check with the CPU and motherboard manufacturer for compatible products and supported memory versions.
- Key Compliance Checks:
- RAM Speed and Motherboard: Check if your motherboard supports the RAM’s speed.
- CPU Memory Limitation: Verify with the CPU specifications for maximum memory support.
- Dual or Quad Channel Support: Ensure the RAM sticks are installed in the correct configuration (refer to your motherboard’s manual).
Reinstalling the Operating System
At times, a fresh installation of the operating system can resolve RAM detection issues, especially if the current system files are corrupted. Before this, confirm you are using a 64-bit version, as 32-bit systems have inherent memory limitations.
Back up essential files before proceeding with a new Windows installation or restoring to an earlier point when the full RAM capacity was usable.
- Reinstallation Steps:
- Back up your important data.
- Obtain the latest version of your operating system.
- Boot from the installation media and follow the on-screen prompts.
- Check if the full RAM capacity is usable post-installation.
By following these advanced steps with consideration for the specifics of your hardware and software, you can maximize your system’s RAM performance and tackle issues of undetected RAM.
Maintaining RAM for Future Upgrades

When you’re planning future upgrades for your computer, it’s essential to maintain your existing RAM modules to ensure they remain compatible and perform optimally. Here’s a guide to keep your RAM in top shape:
Check for Compatibility: Always verify that the new RAM is compatible with your system’s motherboard. The manufacturer’s specification should list compatible memory modules and maximum supported capacity.
Inspect for Physical Damage: Before any upgrade, carefully inspect your current RAM for any signs of physical damage. Look for bent pins or debris that may interfere with functionality.
Upgrade in Pairs: Try to upgrade your RAM in pairs to maintain optimal performance. If your system supports dual-channel memory, matching pairs are essential to take full advantage of increased bandwidth.
Keep Firmware Updated: Ensure your system’s firmware, including the BIOS or UEFI, is up to date. Manufacturers often release updates that can improve compatibility and performance with new memory modules.
ESD Precautions: Be mindful of electrostatic discharge (ESD). Ground yourself or wear an ESD strap when handling RAM to prevent damage to the memory chips.
Memory Testing: After installing new RAM, run a memory test to verify that all modules are functioning correctly. A stable system without errors indicates successful installation and maintenance.
| Maintenance Task | Description |
|---|---|
| Compatibility Check | Match RAM with system’s motherboard for compatibility |
| Physical Inspection | Examine RAM modules for damage |
| Pairing During Upgrade | Install RAM in pairs for systems with dual-channel capabilities |
| Firmware Updates | Update system firmware for enhanced memory performance |
| ESD Safety | Take precautions against electrostatic discharge during handling |
| Memory Testing | Test new RAM to ensure error-free performance |
By following these steps, you can maintain your RAM and ensure it’s ready for future upgrades without compromising your system’s integrity or performance.