
When your computer fails to recognize newly installed RAM, it can be a frustrating experience. Memory is a critical component as it acts as your PC’s workspace, directly affecting its speed and ability to manage multiple tasks.
If your PC doesn’t acknowledge the presence of the RAM, it essentially means that your system’s performance potential is not being fully utilized. This issue may stem from a variety of causes, including incorrect RAM seating, compatibility issues, or incorrect BIOS settings.

To tackle this, ensure that the RAM modules are properly seated in the motherboard slots with the clips securely fastened. This prevents movement and ensures a solid connection.
Compatibility is also key; the RAM you’re trying to install should match the specifications required by your motherboard. Some systems may be pickier with the types and speeds of RAM they support, and using incompatible memory can result in it not being detected.
Moreover, delve into the system’s BIOS settings—this is the primary interface between the PC’s firmware and its hardware. Wrong settings here can prevent RAM from being recognized.
Check if the installed memory is reflected in the system information and that there are no limits set on the maximum amount of memory that can be used. If all else fails, consulting your motherboard’s manual or the PC manufacturer’s support can provide model-specific guidance.
Understanding RAM and Compatibility Issues
Your computer’s performance is heavily reliant on the Random Access Memory (RAM). Understanding its role and ensuring it is compatible with your motherboard are critical steps to optimize your system’s efficiency.
The Role of RAM in Your Computer
RAM serves as your computer’s short-term memory, which it uses to store data that is actively being worked on. This temporary storage allows for quick access to the data, thus speeding up processing times.
Your applications and operating systems utilize RAM to operate effectively. When installing RAM, you typically insert DIMM modules into slots on the motherboard that are designed to accommodate them. The amount and type of RAM your computer can handle are determined by its motherboard.
Compatibility Between RAM and Motherboard
Compatibility is key when it comes to installing RAM in your computer. Your motherboard dictates the type and amount of memory you can install. For instance, older motherboards may only support DDR3 RAM, while newer ones can support DDR4 and beyond.
It’s important to check your motherboard’s specifications for the correct memory type, speed, and maximum capacity. Furthermore, RAM modules need to match in terms of capacity and speed for dual-channel support and optimized performance.
Ensure the RAM you choose is supported by your motherboard to avoid issues with recognition and functionality.
Troubleshooting RAM Recognition Problems
When your computer fails to recognize RAM, it can be due to a variety of issues ranging from seating problems to BIOS settings. Following a systematic approach to troubleshooting can help identify and solve most RAM detection problems.
Initial Diagnostic Steps
First, confirm that your computer’s BIOS or UEFI settings are correctly identifying the RAM. Access the BIOS/UEFI during the startup process, which varies by the make and model of your motherboard.
Look for the RAM or memory section to check if the installed RAM is correctly displayed. It’s imperative that the RAM modules are compatible with your motherboard and that they’re properly seated in the memory slots.
If you’re using a Windows operating system, make sure it is up to date, as some updates can improve hardware compatibility.
Using Diagnostic Software to Detect RAM
Leverage diagnostic software like Memtest86 or the Windows Memory Diagnostic tool to test the RAM. These programs will scan your RAM for errors and compatibility issues.
To use them, follow their respective guides to create a bootable device and run the test. For Linux users, similar tools are available that can check for RAM issues.
Memtest86
Windows Memory Diagnostic
- Type ‘Windows Memory Diagnostic’ into the start menu and select the application.
- Choose to restart now and check for problems.
- After reboot, the tool will run before the operating system loads.
Inspecting Hardware and Electrical Contacts
Physically inspect the RAM modules and slots on your motherboard for any debris or damage. Use compressed air to blow out any dust from the slot that can interfere with the connection.
If contact points show signs of corrosion or residue, gently clean the electrical contacts with isopropyl alcohol and a lint-free cloth, taking care not to damage any components. Remember to ensure your computer is powered off and disconnected from any power source before attempting to clean or reseat any hardware.
Correcting System Configuration for RAM Detection

When your PC fails to recognize RAM, the issue often lies in the system configuration. Ensuring proper BIOS or UEFI settings, configuring RAM in Windows, and harnessing maximum capacity with Msconfig are crucial steps.
Adjusting BIOS or UEFI Settings
Restart your PC and press the key that takes you into the BIOS/UEFI (usually F2, F10, F12, or Del). Within the BIOS/UEFI menu, look for Memory Settings which can be under Advanced Options or a similarly named section.
Here, ensure that your RAM is recognized and the proper capacity—be it 8 GB or 16 GB—is accurately reflected. Some systems may require you to enable the memory slot manually if the BIOS does not detect the new RAM.
Setting up RAM Configuration in Windows
Next, navigate to Windows System Configuration by typing msconfig in the search bar and selecting the relevant result. Under the Boot tab, click on Advanced Options.
If there’s a maximum memory option, uncheck it to ensure that Windows can allocate the correct amount of RAM, particularly if you’re integrating new RAM sticks into your system.
Maximizing Available RAM Capacity with Msconfig
Lastly, the use of Msconfig can help address when the installed RAM is recognized in BIOS but not in Windows. Again within the System Configuration utility, under the Boot tab and Advanced Options, inspect the maximum memory setting.
Ensure this field is either unchecked or set to the highest possible value to reflect the total installed RAM capacity. Keep in mind, that integrated graphics can reserve some portion of the capacity, and adjusting this may require looking at BIOS settings.
Ensuring Proper RAM Installation and Handling

When installing RAM on your desktop or laptop, it’s vital to ensure that the memory modules are seated correctly and free from physical contaminants. This can prevent many common errors and extend the lifespan of your RAM.
Verifying RAM Seating and Installation
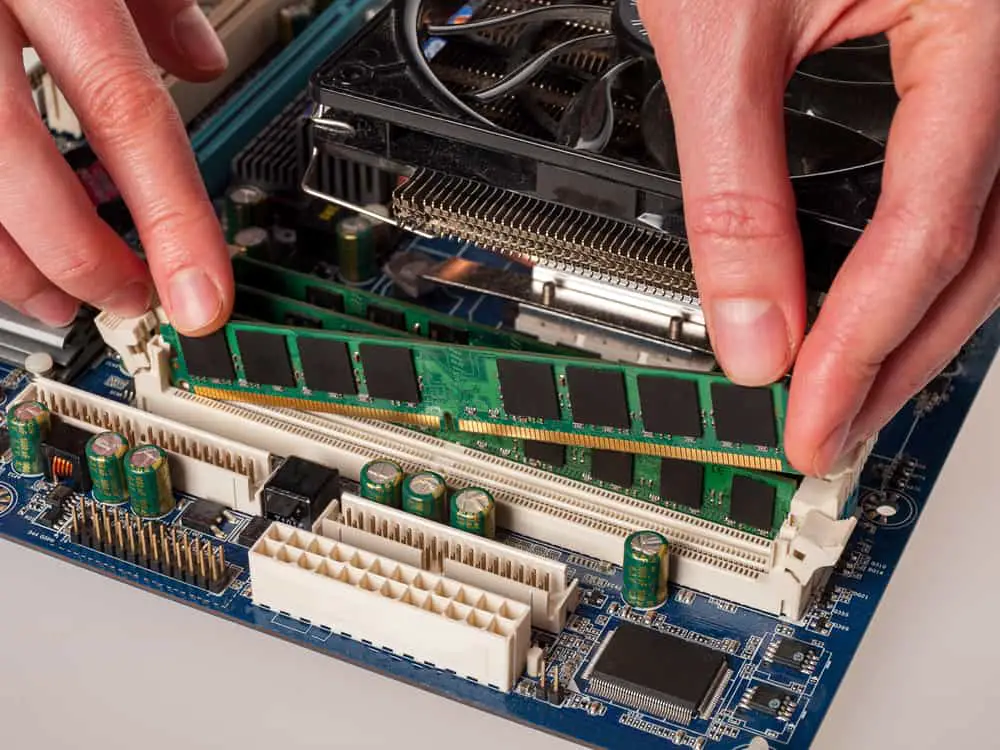
First, check the seating of your RAM modules to confirm they’re fully inserted into the memory slots.
You should hear a click as the side clips secure the RAM in place. For desktop computers, press down on the edges of the RAM module until both clips snap into place. For laptops, the angle at which you insert the RAM may differ, usually around 45 degrees before pressing down.
If the module is not aligned properly or not fully inserted, your computer may fail to recognize the newly installed memory, leading to faulty performance or errors.
- Steps to Verify Proper Installation:
- Power down your computer and remove all cables.
- Open your computer’s case or access panel.
- Gently press on the edges of the RAM module to ensure it is securely locked into place by the clips on either side.
- Check that the notch on the bottom of the RAM module lines up with the ridge on the circuit board slot.
- Confirm that no excessive force is required – if it doesn’t fit easily, it may be the wrong type of RAM for your motherboard.
Cleaning RAM Modules and Contacts
If your computer is still not recognizing the RAM after verifying installation, you might need to clean the electrical contacts. Over time dust and debris can accumulate on the RAM contacts, preventing a good connection to the motherboard.
- Steps to Clean RAM Modules:
- Gently remove the RAM module from its slot.
- Use a soft, lint-free cloth to wipe the gold contacts on the bottom of the module. Do not use liquid cleaners.
- For stubborn dirt, a rubber eraser can be gently used to rub off debris from the contacts. Followed by wiping with the cloth again.
- Place the RAM module back into its slot, ensuring it’s properly seated.
By carefully verifying the seating and installation, and cleaning the contacts when necessary, you can solve many common issues related to RAM detection errors in both desktop computers and laptops.
Proper handling ensures that memory functions optimally and is recognized by your system.