Upgrading the RAM in your computer is a common procedure intended to improve performance. However, you may encounter a situation where your PC refuses to boot after installing new RAM.
This issue can have various causes but often revolves around compatibility, incorrect installation, or BIOS settings.

When you install new RAM, compatibility is a crucial factor. The new memory must match the specifications supported by your motherboard and processor.
This includes the type, speed, size, and voltage of the RAM. If the new modules are incompatible with your system, your computer might fail to boot.
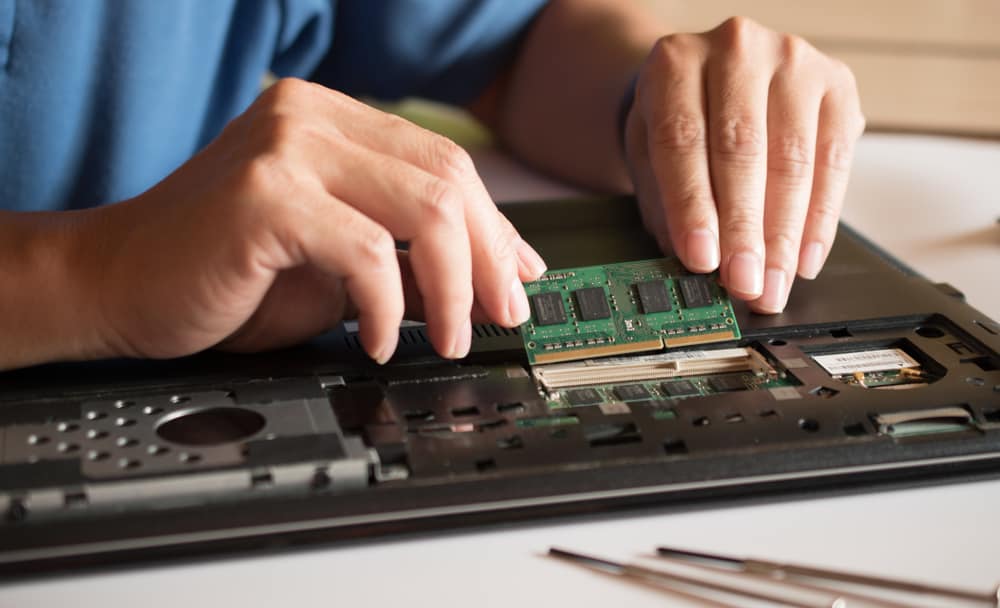
Additionally, proper installation of RAM is essential. The memory sticks should be firmly seated in the correct orientation, and the retaining clips should click into place. If the RAM is not installed correctly, the computer may not recognize the new memory, preventing it from booting.
If these initial checks don’t resolve the problem, further troubleshooting steps, like resetting the BIOS or checking for firmware updates, might be required.
Determining RAM Compatibility
When upgrading your system with new RAM, it’s crucial to ensure compatibility to avoid boot issues. RAM must be compatible with your motherboard, suit the available RAM slots, and match supported RAM types.
Understanding Motherboard Support
Your motherboard dictates the type and amount of RAM you can use. It’s designed to support specific RAM technologies, such as DDR3 or DDR4, which are not interchangeable.
Check your motherboard’s documentation or its manufacturer’s website to determine the supported RAM. Ensure the RAM speed is within the range your motherboard can handle.
Checking RAM Slot Configuration
Motherboards have varying RAM slot configurations that affect how RAM should be installed. RAM slots are color-coded to indicate proper placement for dual or quad-channel configurations.
For best performance, RAM sticks should be installed in matching pairs or sets. If you’re adding to existing RAM, install the new sticks in the same configuration as the old ones.
Identifying Compatible RAM Types
Ensure the RAM you purchase is the correct type (DDR3, DDR4, etc.) for your motherboard. Additionally, verify the pins on the RAM match your motherboard’s slots—DDR3 and DDR4 use different numbers of pins and are not compatible with slots meant for the other.
RAM sticks also come in different capacities, and your motherboard will have a maximum supported memory limit.
Remember to consult your motherboard’s manual or the manufacturer’s specifications to avoid installing incompatible RAM, which could prevent your computer from booting.
Installation Process and Seating the RAM
When upgrading your computer with new RAM, ensuring a correct installation and proper seating is crucial for system functionality. Missteps in these areas often cause boot issues.
Proper Installation Steps
- Power Down: Before you start, ensure your computer is powered off and disconnected from any power source.
- Ground Yourself: To avoid electrostatic discharge, touch a grounded metal object before handling the RAM.
- Access the motherboard: Open the computer case to reveal the motherboard.
- Locate the DIMM Slots: Identify the RAM slots, which are typically adjacent to the CPU.
- Check for Compatibility: Confirm that your new RAM is compatible with your motherboard’s specifications.
- Align the Notch: Ensure the notch on the RAM stick aligns with the keyed slot on the motherboard. The RAM can only be inserted one way.
Ensuring the RAM Is Properly Seated
-
Open the Clips: Most RAM slots have clips at the ends; open these clips to prepare for the RAM’s insertion.
-
Insert at an Angle: Position the RAM at a slight angle relative to the motherboard, aligning with the slot.
-
Apply Even Pressure: Gently but firmly press down on the RAM until the clips automatically snap into place, indicating the RAM is properly seated.
-
Check for Security: Lightly tug on the RAM to confirm it’s secured in place.
-
Visual Inspection: Look at the RAM to see if it sits evenly in the slot.
Addressing Common Seating Issues
-
Realign and Reattempt: If the computer doesn’t boot, power down and reseat the RAM, verifying that the notch aligns with the slot and that the stick sits evenly.
-
Alternate Slots: If boot issues persist, try inserting the RAM into a different slot as some motherboards are particular about which slots are populated first.
-
Inspect the Slots: Look for debris or damage in the RAM slots that could prevent proper installation.
-
Contact Support: If problems continue after reseating and alternating slots, it may be necessary to consult your motherboard’s support documentation or contact technical support for assistance.
Troubleshooting Boot Issues

When your computer fails to boot after installing new RAM, it’s crucial to accurately diagnose the issue. The key steps involve interpreting error messages, ensuring proper power delivery, and potentially resetting the CMOS battery to resolve hardware detection issues.
Interpreting Error Messages
Immediately after a boot attempt, if your screen displays an error message, take note as it often indicates the specific issue. For instance, a beep code or a visual error could suggest defective RAM.
Consult your motherboard manual or manufacturer’s website for an explanation of these codes.
Resolving Power and Boot Problems
Ensure that the power button functions correctly and that your PC completes the power-on self-test (POST). If your system powers on but doesn’t boot, bad RAM could be preventing POST completion. Try reseating the RAM sticks or using one at a time to identify a faulty module.
Resetting the CMOS Battery
If boot problems persist, resetting the CMOS battery may help, as it restores the motherboard’s BIOS settings to default. To reset, power down your PC, remove the CMOS battery for a few minutes, then reinsert it. This can often resolve boot issues related to hardware changes.
BIOS Configuration and Software Considerations

When upgrading your RAM, ensuring proper BIOS configuration is critical for system compatibility and optimal performance.
Incorrect BIOS settings can prevent your computer from booting properly after installing new memory modules.
Accessing and Updating BIOS
To access your BIOS (Basic Input/Output System), restart your computer and press the designated key shown during the initial boot sequence, which is often Del, F2, or Esc.
Once inside the BIOS, check to see if your new RAM is recognized and ensure that the frequencies match the specifications of your new memory sticks. If issues persist after adjusting the frequency, consider a BIOS firmware update which can resolve compatibility problems with newer RAM modules.
It’s essential to follow the manufacturer’s instructions closely when updating BIOS to avoid any potential system damage.
Windows Boot Manager and System Files
Moving on to software considerations, Windows Boot Manager plays a pivotal role in your computer’s startup process. If your PC doesn’t boot after a RAM upgrade, Windows 10 or Windows 11 might require system repair due to corrupted boot manager files.
Boot from Windows installation media and use the Automatic Repair feature. If you’re a gamer or rely on your PC for high-demand tasks, ensuring the integrity of system files after a RAM upgrade is vital for peak performance.
If all else fails, running the System File Checker tool can help repair any damaged or missing system files that could be causing boot issues.

